It is often said that good lighting as much about timing as anything else so it is important to understand the concepts of timing and transitions used throughout Designer:
![]()
Timing values pertain to presets placed on timelines and determine the Start, End and Length times and may be numerically set as an alternative to dragging.
Transition values pertain to Mover preset defaults and presets placed on timelines and determine what sort of cross fade is rendered. The use of interesting transitions can transform your project so it is well worth spending some time experimenting to see what can be achieved using these properties:
Sets the overall length of the transition, default value is 2 seconds.
Sets the time used for a preset to “release” its fixtures when it completes, default value is 2 seconds.
Specifies the cross fade path, default is Default meaning that each pixel or parameter will use the library default path (or Dimmer Curve if specified), typically Linear for intensity/position and Start for colour/gobo wheels. Some interesting additional paths are provided for your delectation.
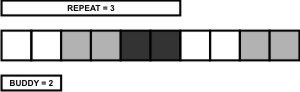
Various different skews can be selected to alter how individual fixtures (and pixels within fixtures in the case of compound fixtures such as battens and tiles) behave within the fade, default is None which means that all fixtures/pixels fade together. Use skews to create “multi-part” fades so that fixtures/pixels fly in one by one for example (set to Individually) - you may have to increase the fade time to clearly perceive the skew especially with lots of fixtures/pixels.
The ordering of a skewed transition depends on the fixture/pixel ordering within the group. The Skew Direction drop-down provides further ordering options such as Forwards and Backwards for additional flexibility. Additional groups can be created with different fixture/pixel ordering to achieve other skewed effects.
Specifies the number of adjacent fixtures/pixels over which a skewed transition is applied, default is All meaning that the skew will span the entire selection. Typically you set this value to be equal to the number of pixels in a compound fixture or the number of fixtures in a zone or on a truss, experimentation is recommended as interesting effects can be achieved.
Specifies the number of fixtures/pixels that will fade together within a skewed transition, default is 1 meaning that each fixture/pixel will fade independently. Set to 2 to make pairs fade together, 3 for threesomes etc. Again, experimentation recommended.
Since the Pixel Matrices onto which you place Matrix and Media presets have spatial awareness, the available skews are more powerful and are akin to video wipes - you may have to increase the fade time to clearly perceive the skew.
Sets the hardness of the skew; whether the edge of the wipe is hard (0%) or soft (100%).
Some skews (for example Linear or Radial Wipe) can optionally accept an angle value that alters the direction or start point of the transition.
Timing fields display times in the format hh:mm:ss.cc (hours:minutes:seconds.centiseconds), although leading zeros are not displayed. 24 hours (24:00:00.00) is the maximum timeline length and thus timing duration.
When setting times you can enter in this format directly (omitting leading zeros) or you can use h, m & s to specify your units and Designer will reformat accordingly. Furthermore, any number input without separators (h, m, s or :) is taken literally if it is valid as such or converted if not, here a decimal point will always denote centiseconds.
For example:
| 00:01:30.00 | 1 minute and 30 seconds | (00:01:30.00) |
| 1:30 | 1 minute and 30 seconds | (00:01:30.00) |
| 90s | 1 minute and 30 seconds | (00:01:30.00) |
| 1h2.5m | 1 hour, 2 minutes and 30 seconds | (01:02:30.00) |
| 2h7m45.5s | 2 hours, 7 minutes, 45 seconds and 50 centiseconds (half a second) | (02:07:45.50) |
| 99 | 1 minute, 39 seconds ("99" not valid so converted) | (00:01:39.00) |
| 100 | 1 minute,0 seconds ("100" valid so taken literally) | (00:01:00.00) |
| 2020 | 20 minutes, 20 second | (00:20:20.00) |
| 30.1 | 30 seconds and 10 centiseconds (tenth of a second) | (00:00:30.10) |
The Pharos Controllers use the Latest Takes Precedent Plus (LTP+) system (popularised by Flying Pig Systems in the early 1990s) to determine what to output to a fixture (or, strictly speaking, fixture element or parameter) at playback runtime. LTP+ was an enhancement of the standard LTP system and was designed to incorporate automated lighting control. The "rules" of the LTP+ system are as follows:
Since the Controllers can run multiple timelines simultaneously then some consideration should be given as to how best structure the project. This is particularly important if the project calls for random triggering of timelines, for example from a Button Panel Station (BPS), since there is no way of knowing in advance what state the output will be in (i.e. which timelines have already been triggered) when a new timeline triggered. This interaction of timelines can yield unexpected results unless care is taken when programming.